Every 30 minutes, a snapshot of all the indices in your cluster is taken. Elastic Cloud keeps 48 hours worth of snapshots. These snapshots can be used to recover from failure when not enough data centers are used to provide high availability, to recover from accidental deletion, and to copy an index.
Snapshots back up all open indices. If you close an index, it is not included in snapshots and you will not be able to restore the data.
List Available Snapshots
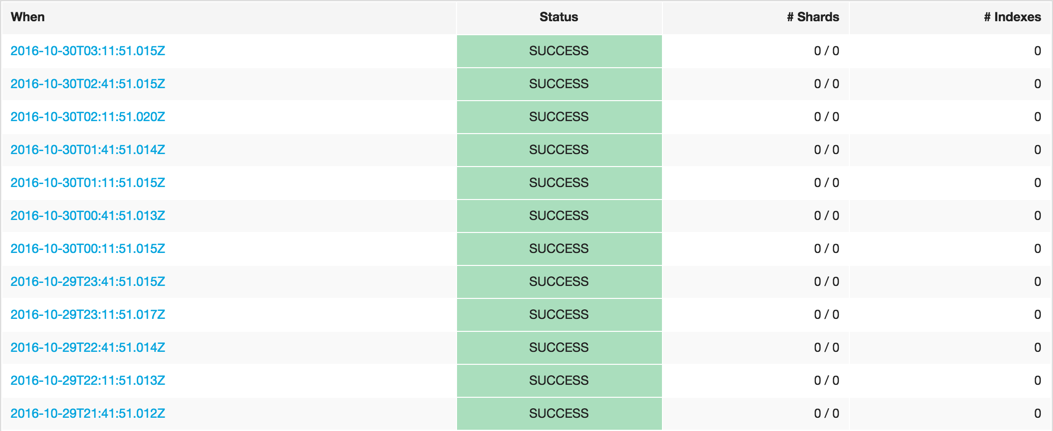
To list all available snapshots, log into the Elastic Cloud Console and go to the Snapshots page. The list of available snapshots is shown, newest first:

The listing shows when the snapshot was completed, whether the snapshot succeeded or was only partially successful, along with the number of shards and indices in the snapshot.
Restore a Snapshot
To restore a snapshot:
- List the available snapshots, and click on the timestamp link of a snapshot to see the snapshot details.
Optional: In the Restore section, specify how you want to restore the snapshot. If you do not specify any options, all the indices of the snapshot are restored on the cluster where the snapshot was taken.
In the Indexes field, you can limit which indices get restored by specifying an index pattern. For example, entering
logstash-*,.kibanarestores any indices starting withlogstash-as well as the.kibanaindex. All other indices are ignored.You might need to specify values in the Rename pattern and Rename replacement fields, if you restore to the same cluster, as you cannot restore to an index that already exists.
In the Cluster dropdown, you can choose another cluster to restore to, which is useful for restoring across clusters. If left blank, the snapshot is restored on the cluster where it was taken.
- Click Restore.
After the snapshot is restored, a brief message indicates that the operation was successful.
Restore Across Clusters
Snapshots can be restored to either the same cluster or to another cluster. If you are restoring all indices to another cluster, you can clone a cluster.
Users created using the X-Pack security features or using Shield are not included when you restore across clusters, only data from Elasticsearch indices is restored. If you do want to create a cloned cluster with the same users as your old cluster, you need to recreate the users manually on the new cluster.
Restoring to another cluster is useful for scenarios where isolating activities on a separate cluster is beneficial, such as:
- Performing ad hoc analytics
- For most logging and metrics use cases, it is cost prohibitive to have all the data in memory, even if it would provide the best performance for aggregations. Cloning the relevant data to an ad hoc analytics cluster that can be discarded after use is a cost effective way to experiment with your data, without risk to existing clusters used for production.
- Testing upgrades
- The safest way to check that both your indices and your applications are ready for the next Elasticsearch version is to copy the indices to a new cluster and to test your applications with the new version of Elasticsearch there. It’s what we recommend for major version upgrades.
- Enabling your developers
- Realistic test data is crucial for uncovering unexpected errors early in the development cycle. What can be more realistic than actual data from a production cluster? Giving your developers access to real production data is a great way to break down silos.
- Testing mapping changes
- Mapping changes almost always require reindexing. Unless your data volume is trivial, reindexing requires time and tweaking the parameters to achieve the best reindexing performance usually takes a little trial and error. While this use case could also be handled by running the scan and scroll query directly against the source cluster, a long lived scroll has the side effect of blocking merges even if the scan query is very light weight.
- Integration testing
- Test your application against a real live Elasticsearch instance with actual data. If you automate this, you could also aggregate performance metrics from the tests and use those metrics to detect if a change in your application has introduced a performance degradation.
A cluster is eligible as a destination for a snapshot restore if it meets these criteria:
-
The cluster is in the same region. For exampple, a snapshot made in
eu-west-1cannot be restored tous-east-1at this point. If you need to restore snapshots across regions, use a custom repository. - The destination cluster is able to read the indices. For the time being, this means that a cluster must have an Elasticsearch version that is equal to or higher than the source cluster.
To restore snapshots across clusters:
Use one of the available methods:
When creating a new cluster: In the Restore from another cluster section, select the cluster that you want to restore a snapshot from. The latest successful snapshot from the cluster you selected is restored on the new cluster when you create it.

When restoring a snapshot: In the Restore section of the page that shows the details of a snapshot, select the cluster to restore the snapshot to. You might need to create a new cluster to restore the snapshot to first.

- Manually recreate users using the X-Pack security features or using Shield on the new cluster. User information is not included when you restore across clusters.